
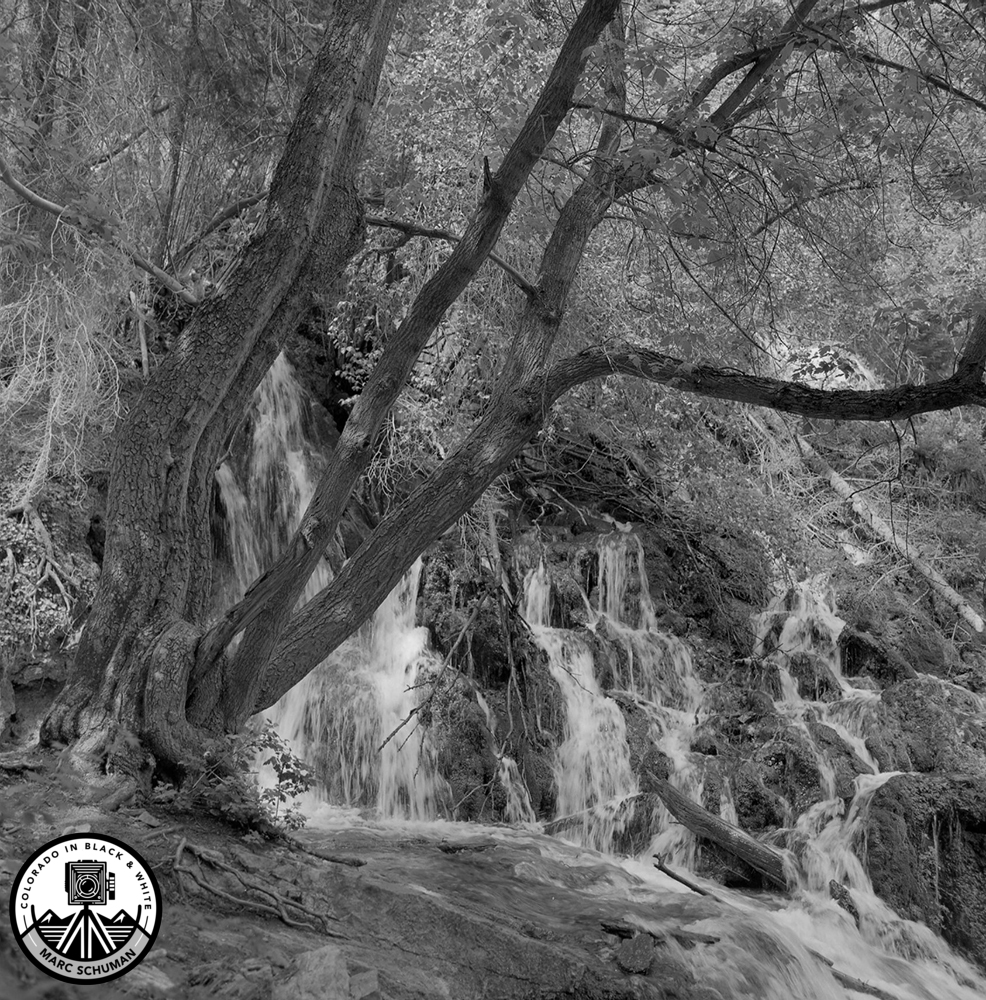
A mountain storm can be magnificent in color and still make a weak black-and-white photograph. Remove the blue sky, green foothills, and red sandstone, and the picture must stand on structure alone: the direction of light, the shape of the land, the separation of tones, and the emotional force of the moment. That is the essential lesson in how to do black and white photography. Monochrome is not color photography with the saturation removed. It is a deliberate way of seeing.
Black and white has the ability to make a familiar subject feel more permanent. It can reveal the weathered grain of a barn, the hard geometry of a railroad yard, the shine of wet pavement, or the immense quiet of a Western landscape. But its apparent simplicity can be deceptive. Strong results come from patient observation, measured exposure, and a clear intention for the final print.
Begin by Seeing in Tone, Not Color
Before raising the camera, ask what will remain when color is gone. Look for the visual relationships between light and dark rather than the names of the colors in front of you. A yellow field and a pale blue sky may look very different to the eye but translate to nearly the same gray in a monochrome image. If they merge, the photograph loses depth.
Train yourself to notice the tonal value of surfaces. Snow, limestone, sunlit clouds, painted wood, and weathered metal can all become bright areas, though each reflects light differently. Deep shadows in forests, dark water, black rock, and old railroad ties can anchor a composition. The most satisfying photographs usually have a reason for every major light and dark area.
This does not mean every image needs pure black and paper white. A foggy morning may call for a restrained range of soft grays. A high-desert scene under hard sun may benefit from deep blacks and brilliant highlights. The right tonal range depends on the subject and the feeling you want the finished photograph to hold.
Build the Photograph Around Shape and Light
Color can sometimes carry an otherwise ordinary picture. In black and white, composition has nowhere to hide. Begin with the larger shapes: a ridge line crossing the frame, the curve of a road, the repeating verticals of a pier, or a lone tree set against open sky. These elements should make sense before fine detail enters the equation.
Light gives those shapes their weight. Side light is especially useful because it reveals texture in stone, wood, snow, and water. Early and late light often creates long shadows that add rhythm and depth, while overcast conditions can be ideal for portraits, forests, and subjects with subtle surface detail. Flat light is not automatically bad, but it needs a subject whose form or mood does not depend on dramatic contrast.
Watch the background with particular care. A dark subject against a dark background may disappear unless an edge catches the light. A bright sky behind a pale building can make the building lose its presence. Moving a few steps, changing your camera height, or waiting for a cloud to shift can solve problems that no amount of editing will truly repair.
Use Contrast With Restraint
Black and white is often associated with bold contrast, but contrast is a tool, not a requirement. Too much can turn delicate cloud detail into blank white areas and shadows into featureless blocks. Too little can leave a photograph without direction.
Consider local contrast as well as overall contrast. A weathered fence may need only a slight tonal separation from the field behind it. A dramatic storm cloud may require more distinction in its edges and interior texture. The goal is not a uniformly punchy image. It is a print in which the eye can travel naturally from one important area to the next.
How to Do Black and White Photography With Intentional Exposure
Exposure in monochrome photography is best approached as an interpretation. The camera records light, but the photographer decides how that light should be rendered. A pale subject need not become middle gray simply because the meter suggests it. Snow should usually look luminous, while retaining texture. A black locomotive should feel dark, but still reveal its curves, rivets, and reflected highlights.
With digital cameras, use the histogram and highlight warnings as useful guides. Protecting important highlight detail is often wise, especially in clouds, white water, or sunlit snow. At the same time, do not become so cautious that every photograph is timid and gray. Make a considered exposure, review it, and adjust based on what matters in the scene.
Film asks for a similarly disciplined approach, though with different latitude and response. Black-and-white negative film often holds generous highlight detail when given sufficient exposure, while development strongly affects contrast. Many photographers work from the principle of exposing for shadow detail and developing for the highlights they want. It remains a valuable way to think because it connects exposure to the final print rather than treating it as a purely mechanical setting.
A tripod can be one of the most useful tools in this process. It slows the act of looking, allows careful framing, and makes longer exposures practical in low light. For landscapes, architecture, and historical subjects, that slower pace is often an advantage rather than a limitation.
Choose Filters and Processing for the Scene
On black-and-white film, colored filters change how colors translate into gray. A yellow filter can add modest separation between clouds and blue sky while remaining natural. Orange increases that effect and can bring more presence to distant landscape forms. A red filter can produce a very dark sky and dramatic cloud contrast, but it can feel heavy-handed when used without a reason. Green filters can be useful with foliage and portraits because they alter the rendering of greens and certain skin tones.
Digital photographers can create similar effects during raw processing by adjusting individual color channels before converting to monochrome. This is one reason a direct black-and-white conversion can be disappointing. The original colors still contain valuable tonal information. Darkening the blue channel can shape a sky; brightening yellow or orange may give sandstone or autumn grass more separation.
Processing should clarify the photograph’s central idea, not advertise itself. Avoid forcing every file into the same preset, deep blacks, or exaggerated grain. A nautical scene in mist may need open shadows and gentle highlights. A steel bridge in winter may call for a harder, more graphic rendering. Let the subject lead.
Make Local Adjustments Carefully
The finest black-and-white prints are rarely the result of a single global adjustment. Darkening a corner can keep the eye inside the frame. Burning a bright cloud can restore its mass. Dodging a face, a rail line, or a shaded rock formation can reveal the visual path through the image.
These adjustments have a long history in the darkroom, where the printmaker controls exposure under the enlarger with hands, cards, and carefully shaped tools. Digital techniques can serve the same purpose, but subtlety remains essential. If the viewer immediately sees the manipulation, it is usually too much. The adjustment should feel like light, not software.
Print to Judge the Photograph Fully
A backlit screen is useful for editing, but it is not the final authority on a black-and-white image. A print reveals whether the shadows are blocked, whether highlights have texture, and whether fine detail supports the composition or merely creates noise. It also reveals the physical character of the photograph: the surface of the paper, the depth of the blacks, and the relationship between image scale and viewing distance.
For a serious print, paper choice matters. Glossy or semi-gloss surfaces can provide rich blacks and strong detail. Matte papers can suit quieter images, softer light, and subjects where texture should feel more tactile than reflective. Traditional silver gelatin fiber prints have a distinctive depth and tonal presence born from the interaction of negative, enlarger light, photographic paper, and darkroom chemistry. Inkjet printing can also be excellent when matched thoughtfully to the image and paper.
Do not assume a photograph that looks strong at eight inches wide will work at forty inches. Large prints demand clean technique, purposeful detail, and a composition that can sustain a longer look. Conversely, an intimate subject may gain power from a smaller scale that invites close viewing.
Practice With Subjects That Teach You Something
Photograph the same place in different conditions. Return to a stand of aspens in sun, fog, rain, and snow. Study a railroad station at noon and again at dusk. Work a single street corner until you understand how its shadows move. Repetition develops judgment because it separates the subject itself from the changing effects of light.
It is also useful to make photographs with a final print in mind. Ask where the darkest area should be, what detail must remain visible, and where the viewer’s eye should rest. That question changes the experience from collecting scenes to making photographs.
The next time a scene stops you, resist the urge to make a quick monochrome conversion and move on. Stay long enough to see how the light describes the subject. A black-and-white photograph earns its lasting presence through those quiet decisions, made before the shutter opens and carried faithfully through to the print.